How to Use Modular Storage for Meal Prep
• Updated
Tired of food waste and chaotic meal prep? Modular storage can streamline your kitchen routine and help save time, money, and effort. By using stackable, airtight containers, you can keep ingredients fresh, maximize fridge space, and reduce waste. Pair this with batch cooking to prep meals for the week in just a few hours.
Key Takeaways:
- Keep food fresh longer: Airtight containers slow spoilage and maintain quality.
- Stay organized: Transparent, stackable designs make it easier to find and use ingredients.
- Cut food waste: Better visibility and portioning reduce forgotten leftovers.
- Save money: Families can save up to $1,500 annually with proper storage practices.
Quick Tips:
- Choose the right material: Glass, stainless steel, plastic, or silicone - each has pros and cons.
- Pick the right size: Use small containers for snacks, medium for meal portions, and large for bulk items.
- Organize your fridge: Label containers and follow the FIFO (First In, First Out) rule.
With the right system and a little planning, modular storage can make meal prep simpler and more efficient. Let’s dive into how to set it up and maintain it!
Benefits of Using Modular Storage for Meal Prep
Keeps Ingredients and Meals Fresh
Airtight seals are a game changer when it comes to meal prep. By keeping oxygen out, they slow down oxidation and bacterial growth, which means your meals stay fresh longer. This simple step helps prevent unwanted changes in texture and flavor, so your food tastes just as good days later as it did on day one.
Separating meal components - like grains, proteins, and sauces - into their own non-porous, modular containers is another smart move. This keeps each ingredient at its best until you're ready to eat. Glass containers, for example, are non-porous, so they won’t absorb odors or stains. That means your Tuesday lunch won't have a hint of Monday's marinara sauce. Keeping ingredients fresh is the cornerstone of successful batch cooking.
Maximizes Kitchen Organization
Square and rectangular containers are a kitchen's best friend. Unlike round ones, they fit snugly against walls and stack neatly, making the most of every inch in your fridge or cabinets. No more wasted corner space.
Transparent containers are another win. They let you see exactly what's inside at a glance, solving the "mystery container" problem where leftovers get shoved to the back and forgotten. Add clear labels, and you can boost your stock rotation efficiency by as much as 45%. This level of organization doesn’t just save time - it also helps reduce food waste with smart meal planning.
Reduces Food Waste
Modular storage systems make it easy to keep track of what’s in your fridge. When food is visible and accessible, you’re less likely to forget about it. As MESS BRANDS puts it:
"An organized fridge doesn't require more willpower; it demands less. By engineering an environment where fresh, healthy food is the most visible and accessible option, you make waste reduction an automatic and effortless habit".
Portioning meals into individual containers also helps you monitor exactly what you have. For a family of four, better storage practices can save around $1,500 in groceries every year. Modular storage systems turn the chaos of a cluttered fridge into an orderly setup where nothing gets lost or wasted.
MEAL PREP CONTAINERS: 4 awesome containers that aren't plastic
How to Choose the Right Modular Storage Containers
Picking the right storage containers does more than just keep your food fresh - it can make meal prep and batch cooking much more efficient, especially when paired with AI meal planning and pantry tracking.
Material and Durability
The material you choose plays a big role in how long your containers last and how safe they are for food storage. Glass is often considered the best option. It’s non-reactive, meaning it won’t leach chemicals, even with acidic or hot foods, and it doesn’t absorb odors or stains. The downside? It’s heavier and prone to breaking if dropped.
Stainless steel is another durable choice. It resists odors and lasts a long time, but it isn’t microwave-safe, and the opaque design makes it harder to see what’s inside.
Plastic containers are lightweight and affordable, but they can show wear over time. If you go with plastic, look for polypropylene (marked with the #5 recycling symbol), as it’s naturally BPA-free. Keep in mind, though, that some studies, including one from Consumer Reports in 2026, raised concerns about chemical leaching when microwaving fatty or acidic foods in plastic containers.
Silicone offers flexibility and performs well in extreme temperatures, from the freezer to the oven. However, it may not stack as effectively and can sometimes leak under pressure.
Size and Stackability
Once you've picked your material, think about the sizes that fit your meal prep needs. Here’s a quick breakdown:
- Small containers (2–12 oz): Perfect for snacks, dressings, or nuts.
- Individual portions (16–30 oz): Ideal for single-serving meals, with 20–25 oz being a great size for balanced lunches.
- Medium containers (32–48 oz): Handy for 2–3 servings or separating components like proteins and grains.
- Large containers (64 oz and up): Great for bulk cooking like soups, stews, or family meals.
For better organization, choose containers with uniform footprints - they stack securely even if the depths vary. Square or rectangular designs are more space-efficient than round ones because they fit neatly against fridge walls and corners. Before buying, measure your fridge and freezer space to ensure the containers fit. If cabinet storage is tight, look for nestable designs that save up to 50% more space.
Special Features
After nailing down the size and shape, consider extra features that make storage even easier.
- Airtight seals and locking latches: These help prevent spills and keep air out, preserving freshness.
- Temperature ratings: Look for freezer-safe options that won’t crack, microwave-safe containers with vented lids, and oven-safe glass containers that can handle up to 425°F.
- Compartments and dividers: These are great for portion control and keeping foods like salads crisp by separating them from dressings or other wet ingredients.
- Transparency: Clear containers make it easy to see what’s inside, helping you avoid forgotten leftovers.
- Vacuum-sealed systems: For long-term storage, vacuum-sealed containers with handheld pumps can extend freshness by removing excess air. For example, the Zwilling Fresh & Save set costs around $140–$160, but budget-friendly options like Rubbermaid Brilliance (approximately $27 for a 5-pack) or mid-range glass sets like Prep Naturals (about $36) are excellent alternatives.
Step-by-Step Guide to Using Modular Storage for Meal Prep
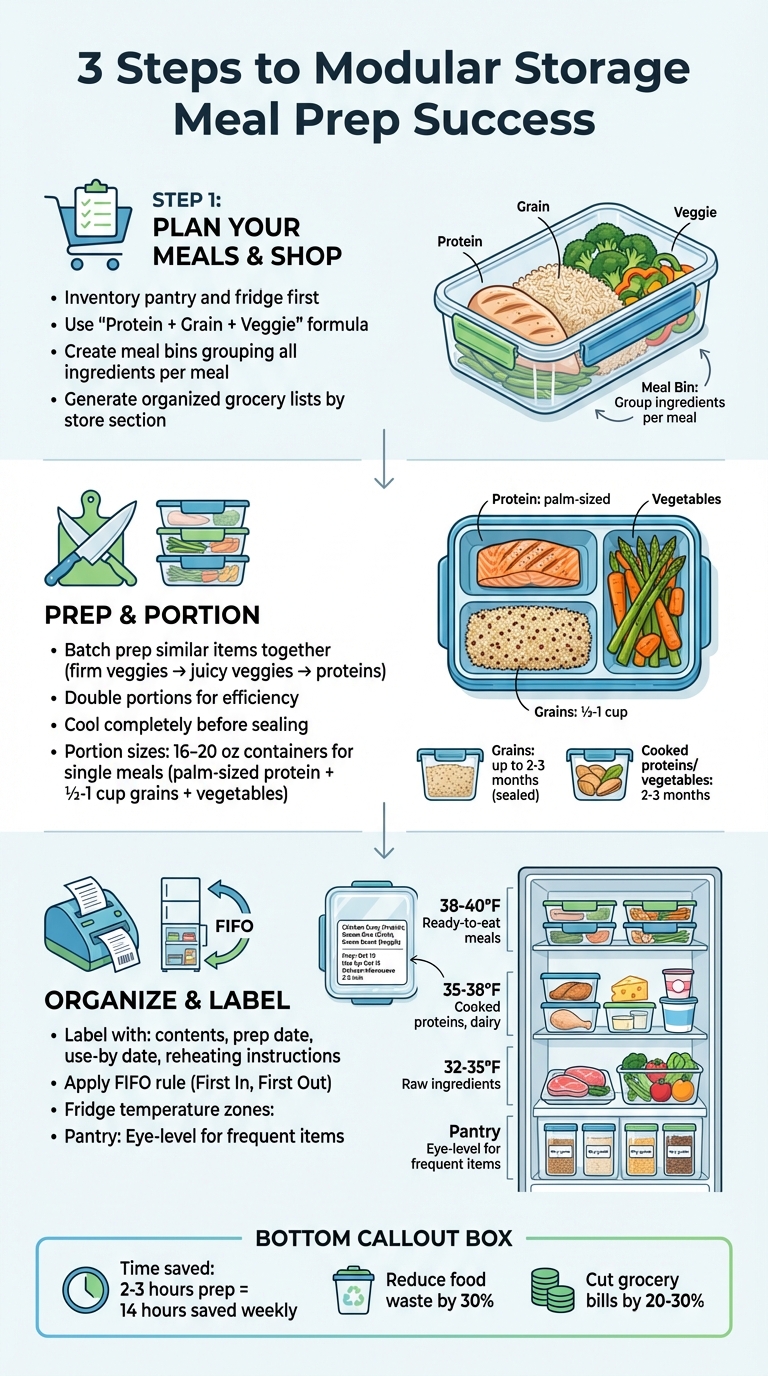
3-Step Guide to Modular Storage Meal Prep System
Once you've got the right containers, it's time to make them work for you. The secret to successful meal prep with modular storage lies in creating a system that flows naturally - from planning and portioning to organizing.
Step 1: Plan Your Meals and Grocery Shopping
Start by taking stock of what’s already in your pantry and fridge. Kristine Rosenblatt, founder of Kristine's Kitchen, puts it perfectly:
"An organized, well-stocked pantry can be the beginning of many healthy meals... Start with the ingredients that you have in your kitchen and build a menu around them".
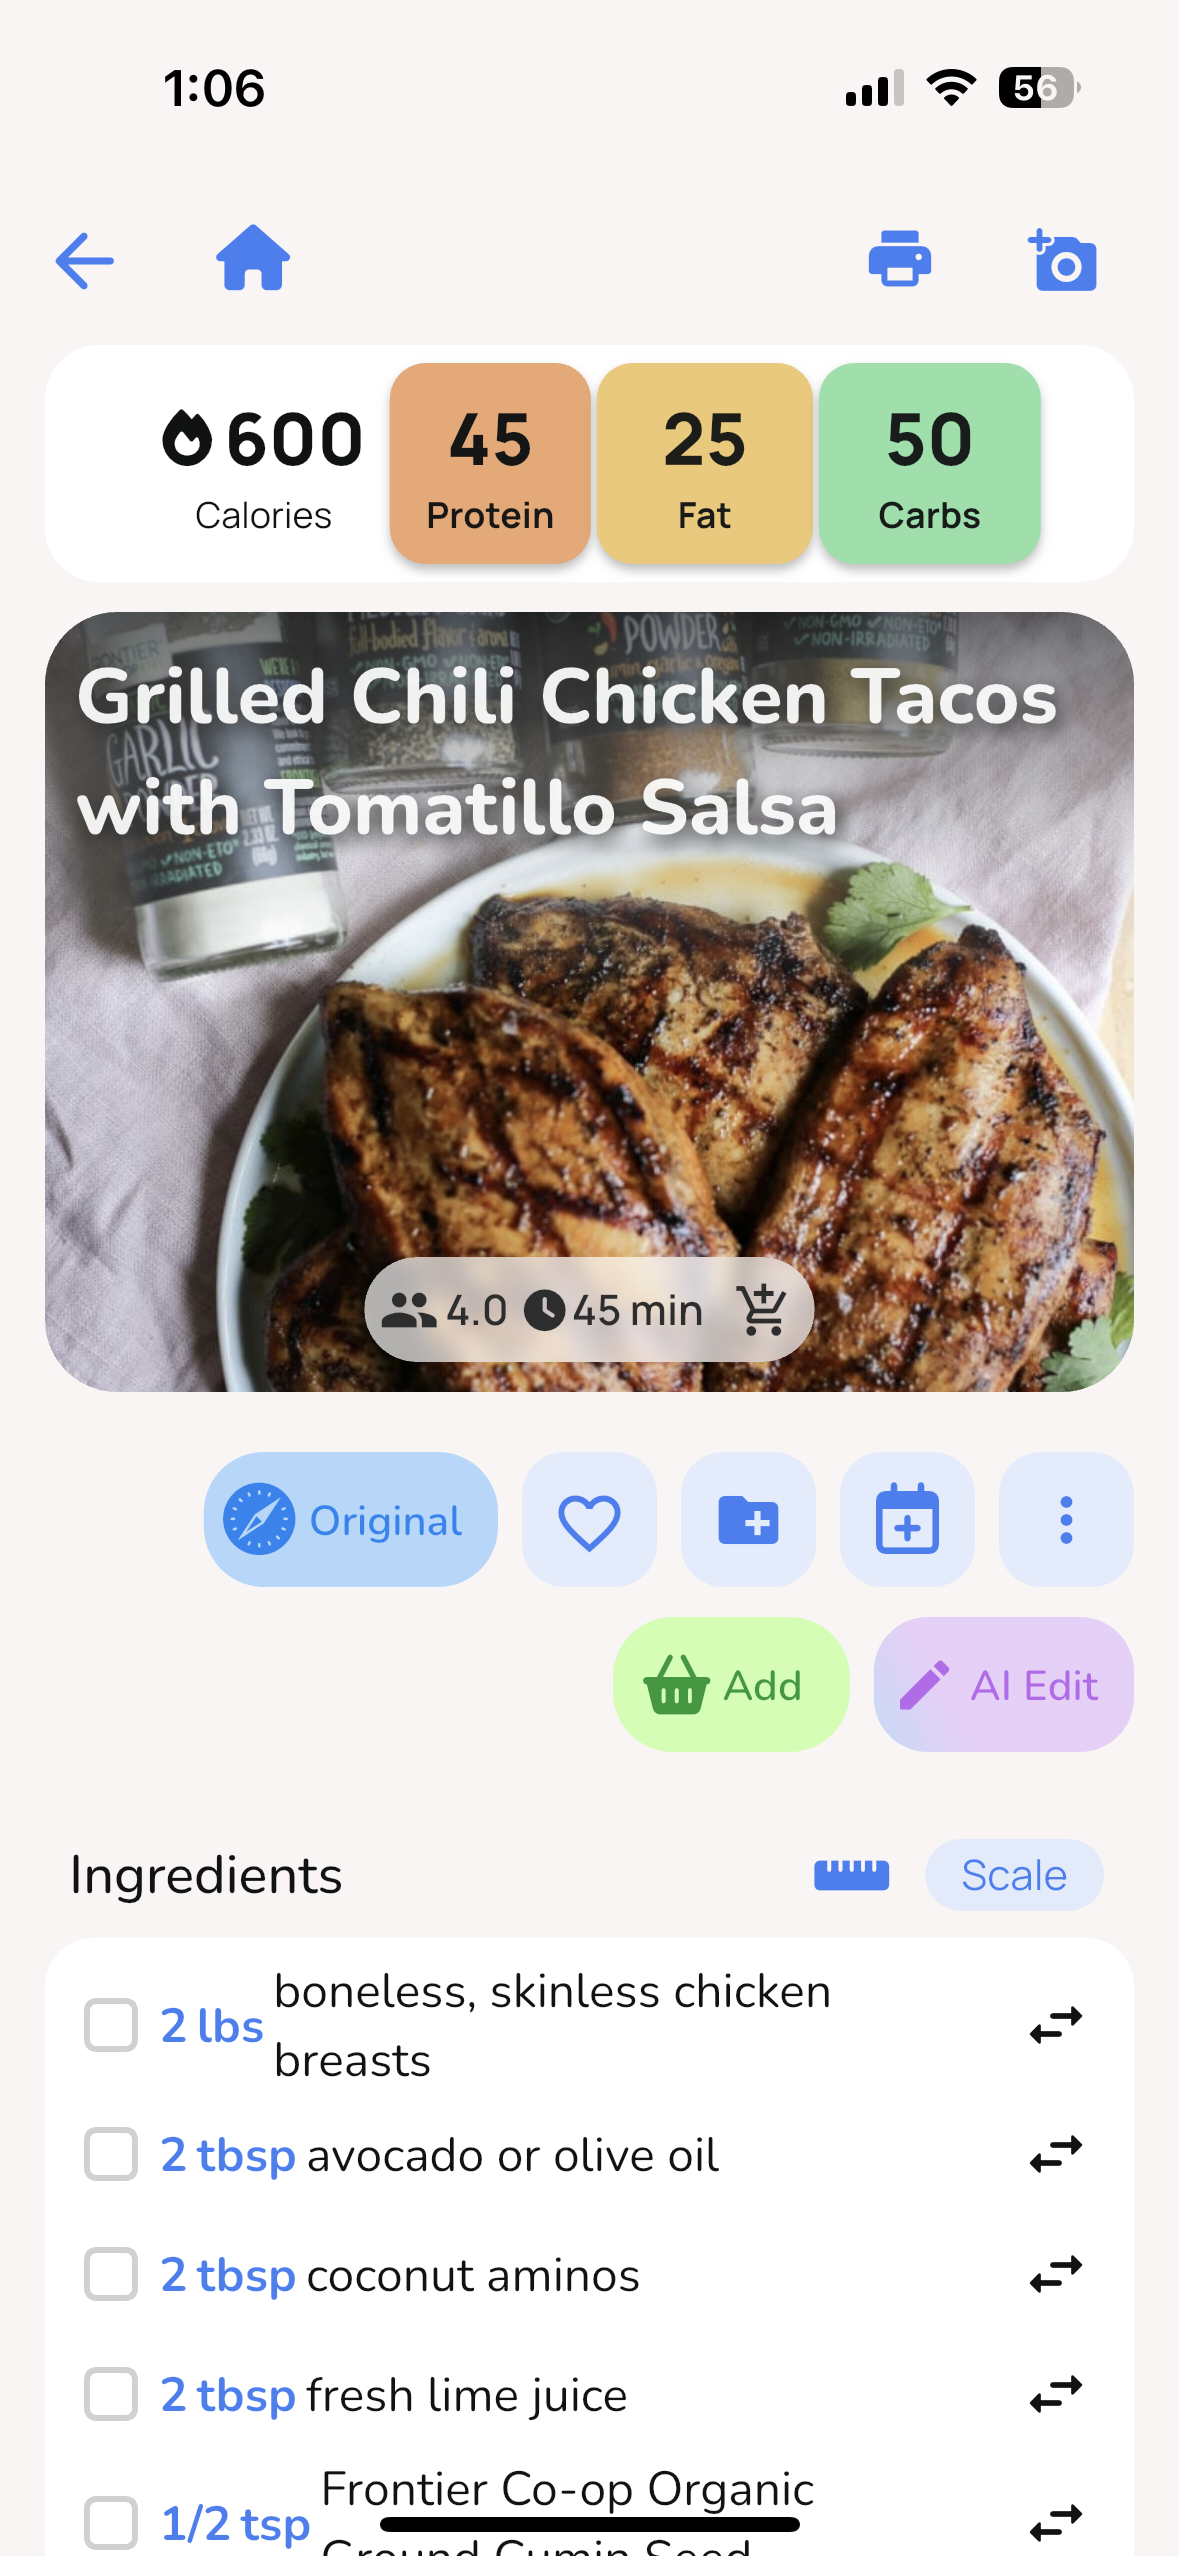
Focus on versatile ingredients that can mix and match easily. A simple “Protein + Grain + Veggie” formula is a great way to create balanced meals without overcomplicating things. This approach also helps avoid the dreaded dinner burnout. Tools like the Honeydew Recipe Manager can make meal planning even easier. With features that let you import recipes from social media, generate grocery lists by store section, and plan weekly menus in seconds, it’s a game-changer. Plus, its AI can suggest recipes based on what’s already in your kitchen, ensuring you don’t overbuy or exceed your storage limits.
After your shopping trip, group all the ingredients for each meal into “meal bins.” This includes pantry staples like spices or canned goods. Brandi Schilhab, author of Fed & Fit, swears by this tip:
"This hack makes it so that you're grabbing ONE thing (a meal bin) versus 10 things (individual ingredients) in order to get dinnertime started".
With your meals planned and ingredients sorted, you’re ready to dive into prepping and portioning.
Step 2: Prep and Portion Ingredients or Meals
Batch prepping is your best friend here - it saves time and keeps cleanup to a minimum. Start by chopping similar vegetables together. Begin with firm, dry items like carrots or bell peppers, then move on to juicier ones like tomatoes. Save raw proteins for last to avoid cross-contamination, and keep a bowl handy for scraps to keep your workspace tidy.
When cooking, double up on portions. Grains can be stored for up to six months in sealed containers, while most cooked proteins and vegetables remain fresh for two to three months. Just make sure everything cools completely before sealing, and leave a little extra space in containers for liquids to prevent condensation or expansion.
For portioning, choose container sizes that suit your meals. A balanced single-serving meal typically fits in a 16–20 oz container. Aim for protein about the size of your palm, half to one cup of grains, and fill the rest with veggies. Divided containers are especially handy for keeping components separate - no soggy salads or mixed-up dressings here.
Now that everything is portioned, it’s time to seal and organize.
Step 3: Organize and Label Containers
Once your meals are prepped and portioned, organizing your containers is the next step to keeping everything fresh and easy to find. Label each container with its contents, the prep date, and a use-by date using waterproof, freezer-safe labels. Adding reheating instructions, like “reheat briefly and add a splash of water,” can save you time and effort later.
Organize your fridge based on temperature zones to maximize freshness. Place ready-to-eat meals on the top shelf (38–40°F), cooked proteins and dairy on the middle shelves (35–38°F), and raw ingredients on the bottom shelf (32–35°F) to avoid cross-contamination. Stick to the FIFO (First In, First Out) rule to make sure older items get used first. For your pantry, keep frequently used staples like oils, spices, and grains at eye level, while less-used items can go on higher or lower shelves.
With everything labeled, organized, and stored, your modular system is ready to make meal prep a breeze!
Maintenance Tips for Modular Storage Systems
Keeping your modular storage system in top shape is the key to maintaining hygiene, extending its lifespan, and ensuring your meal prep stays hassle-free. A little care goes a long way in keeping everything running smoothly.
Cleaning and Care
Always wash containers thoroughly after each use to avoid contamination. Pay extra attention to the sealing areas on lids - these spots can trap germs even if the rest of the container looks spotless. Patricia Escudero Fernandez, Global Director of Product Innovation & Management at Tupperware, offers this advice:
"One handy tip to keep things fresh is to always store containers lid-less. This helps prevent any odors from building up inside the containers."
Make sure containers are completely dry before storing them. For stubborn stains, opt for mild cleaning agents. If you're freezing food in glass containers, leave some extra space to account for expansion. Unless labeled dishwasher safe, stick to handwashing. Regularly inspect your containers for signs of damage - like cracks, warping, or discoloration - and discard any that are compromised, as they may not seal properly.
These consistent cleaning habits not only keep your system hygienic but also make it easier to manage your inventory and scale up your meal prep.
Inventory Management
Clear containers are your best friend when it comes to keeping track of what's in your fridge. Pair them with a visible inventory list on your fridge door to track items nearing expiration. This simple method helps you avoid waste and keeps forgotten leftovers to a minimum. Lisa Zaslow, Founder of Gotham Organizers, suggests a clever trick: attach masking tape to the bottom of containers and remove those you haven’t used within two weeks.
Scaling Up for Batch Cooking
Once your storage system is in good shape, you can focus on expanding your batch cooking routine. Standardizing container shapes and lids will save space and eliminate the headache of mismatched pairs. Opt for rectangular containers to make the most of your shelf space.
For batch cooking, divide large portions into shallow containers (2–3 inches deep) to allow food to cool quickly before refrigerating. This step is crucial for preventing bacterial growth and preserving food quality. To keep your freezer organized, use color-coded baskets - try red for proteins and green for vegetables - so you can grab what you need in seconds.
Conclusion
Modular storage turns meal prep into a simple, time-saving routine that can help you cut costs and reduce waste. Spending just 2–3 hours prepping on the weekend can save up to 14 hours of cooking during the week, while also cutting food waste by 30% and lowering grocery bills by 20–30%. The key lies in using stackable, airtight, and clear containers to keep ingredients fresh and organized, along with a component-based approach that allows you to mix and match proteins, grains, and vegetables for a variety of meals throughout the week. It’s a practical way to bring efficiency to your kitchen.
Start with sturdy, standardized containers, clear labeling, and the FIFO (First In, First Out) method to maintain freshness. Matthew Christensen, Weekly Newsletter Contributor at DVO, explains the concept well:
"A modular food system means every item you buy serves multiple purposes... you prep food in a way that lets you recombine the pieces into different meals all week".
To make things even easier, combine your storage system with tools like the Honeydew Recipe Manager. This app simplifies meal planning, grocery lists, and recipe coordination. With features like AI meal planning and instant recipe imports from social media, you can organize your week in seconds, avoid impulse buys, and ensure every ingredient has a role.
When smart storage meets digital planning, nothing gets wasted or forgotten in the depths of your fridge. Whether you’re cooking for yourself or planning family meals, modular storage provides the foundation for stress-free, consistent meals every week.
FAQs
How many containers do I need to start meal prepping?
The number of containers you'll need varies based on your meal plan, portion sizes, and available storage space. A good starting point for most people is 5 to 10 containers, which should be enough to cover a week's worth of meals, including snacks. If you're cooking for a larger family or preparing multiple meals each day, you might find that 10 to 15 containers work better.
For portion sizes, smaller containers (16–24 oz) are great for individual meals or snacks. On the other hand, larger containers (32–48 oz) are better suited for storing bulk meals or feeding an entire family.
What’s the safest way to cool food before sealing and storing it?
To safely cool food before storing, split it into smaller portions and place them in separate containers. This method speeds up the cooling process and minimizes the chance of bacterial growth. Smaller portions cool more evenly compared to larger amounts, which tend to trap heat and may spoil. Opt for airtight containers to maintain freshness and protect the food from contamination while stored.
How do I prevent freezer burn and leaks with modular containers?
To keep your food safe from freezer burn and prevent leaks, opt for freezer-safe containers. Glass containers with silicone-sealed lids or thick-walled plastic containers work best. Make sure the lids are airtight to stop leaks and avoid pressure buildup. If you're using glass, pre-chill the containers in the fridge before freezing to reduce the risk of thermal shock. For extra safety, wrap glass jars in a towel to help protect against breakage and leaks while freezing.